Service Autopilot Setup Guide: Getting Started (Step-by-Step) | 2026
Quick Answer
Service Autopilot setup follows a fixed sequence: account and business settings, then the Setup Wizard, then services and pricing, employees, customers, scheduling, billing, mobile app, integrations, data migration, and finally a full end-to-end test job before you go live. Most small operations with clean data can complete a working setup in one to two weeks; larger or multi-crew operations, or anyone migrating years of history from another FSM, should plan for three to six weeks.
If you have just purchased Service Autopilot, or you are evaluating it and want to know how the onboarding really works before you commit, this guide takes through the process in the order I recommend you do it (not necessarily the order the software presents it to you).

I have worked with field service businesses about their scheduling, dispatching, CRM, and FSM software implementations for over 11 years, and Service Autopilot installs look similar to me in the first two weeks; teams who put in the work to create a clean foundation (accurate services, pricing, verified customer data) have the opportunity to accelerate the rest of the year, whereas teams who rush to “just get it live” find themselves having to rebuild their service catalog 3 months later (right in the middle of their busy season).
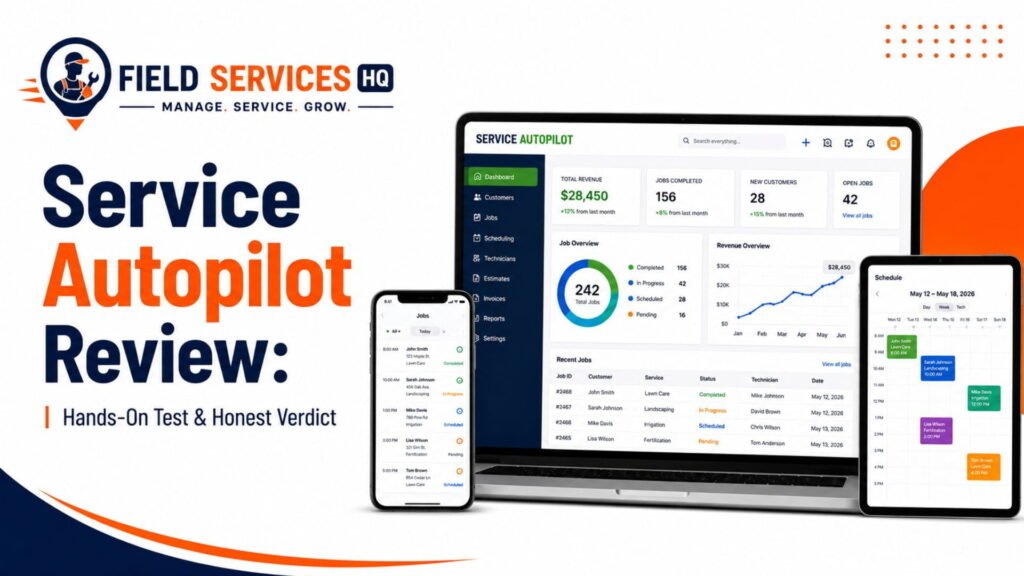
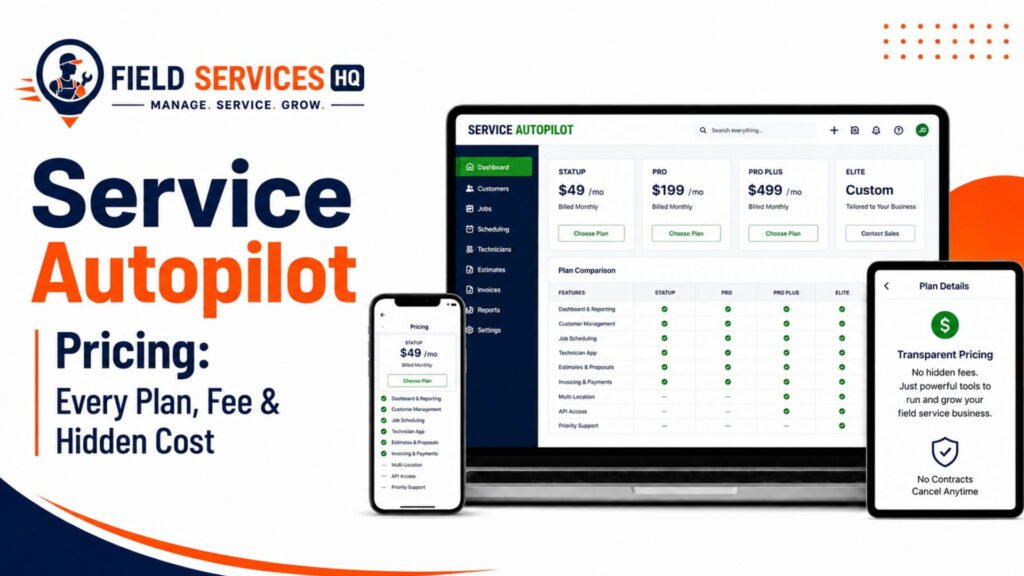
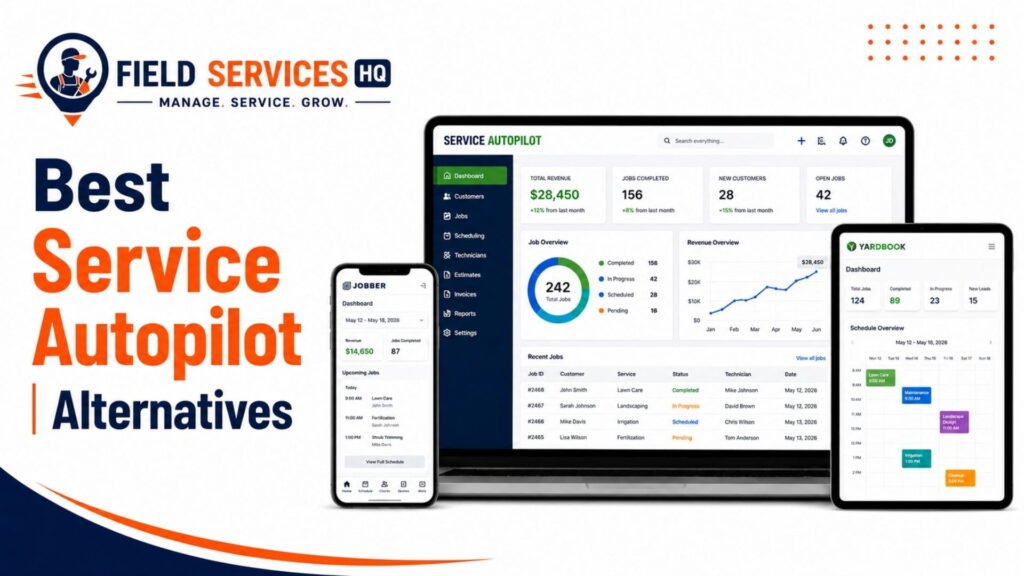
This is not a marketing overview of Service Autopilots’s features. If you are still deciding if the platform is the right fit for your business, start with our full Service Autopilot review, our breakdown of Service Autopilot pricing, and our comparison of Service Autopilot alternatives. This article is intended for those who have made they decision (or are very close to) and want a deep-dive, implementation-level walk through to get their account properly configured.
What Is Service Autopilot?
Service Autopilot is a field service management (FSM) software designed for lawn care, landscaping, snow removal, pest control, and other similar types of businesses.
Essentially, it is an all-in-one solution that includes CRM, scheduling and route optimization, estimates and invoicing, payments, and field service automation. The software is organized as a multi-tiered system, where higher plans offer more advanced features, including route optimization, job costing, and others. The company offers four versions of its FSM software: Startup, Pro, Pro Plus, and Elite (customized), which comes at a negotiated price.
Since the application is complex, as it is supposed to automate most FSM operations, the setup requires more effort compared to similar software. It means that prior to the initial configuration, it is better to have a list of required information ready to minimize the time spent on setup.
Essential Information for the Initial Setup
In addition to a working email address and the account login, one needs to have the following information at hand before starting the initial configuration:
- General Information: the company’s legal name, address, phone number, tax ID, and sales tax by area of operation.
- Services: a list of services or jobs offered and their prices (per visit, per unit, or flat fee).
- Customers: an exported customer list from the accounting software or a spreadsheet with customer names, addresses, and preferably the service history.
- Employees: employee contact information, roles, and phone numbers, and an indication of who needs full access to desktop or mobile versions of the software.
- Existing FSM or CRM data: in case of transition from another FSM software, some configurations can be imported to Service Autopilot.
- Accounting Software: whether the company uses QuickBooks Online or Desktop, and the accounting chart.
- Payment Processor: in case the business wants to accept online payments, additional information from the processor is needed.
The list seems long; however, most of these items can be found in the accounting software or CRM. If some information is missing, it is better to stop at this stage and collect it before proceeding. Additionally, double-checking the prices is critical, as incorrect pricing entered at the beginning of the configuration process can lead to errors, which are hard to correct.
Service Autopilot Setup Checklist
Use this as a pre-flight check before you touch the software:
- Business legal name, address, and tax details confirmed
- Complete service/job type list with current pricing
- Recurring service schedules mapped out (weekly, bi-weekly, monthly, seasonal)
- Customer list exported and cleaned (duplicates removed, addresses standardized)
- Employee and crew roster with roles defined
- Existing FSM data exported, if applicable
- QuickBooks or accounting integration requirements identified
- Decision made on who “owns” setup internally (owner, office manager, or ops lead)
How Service Autopilot Setup Works
The configuration flow for Service Autopilot has certain dependencies. Business settings and the Setup Wizard come first, as most other features reference them (tax, invoice numbering, terms). Services and pricing come next, as these drive estimates, scheduling, and billing.
Employees need to be created before crews can be defined. Customers must exist before any scheduling can occur. Scheduling and billing features follow, and finally, mobile application and integrations are configured, as they depend on prior accuracy.
In practice, this flows into the following: Account → Setup Wizard → Services & Pricing → Employees & Crews → Customers & Properties → Scheduling & Routes → Invoicing & Payments → Mobile App → Integrations → Data Migration → End-to-End Test → Team Training → Go-Live.
Skipping ahead (importing customers before your service list is finalized, for instance) is the single most common cause for needing to redo setup.
Step 1: Account & Business Settings
What to configure: Company name/address, business hours, default tax rates, invoice numbering and terms, branding (logo, colors on customer-facing documents), and user roles for who will manage the account.
Why it matters: These settings drive every estimate, invoice, and customer communication the system produces. Configure tax rules incorrectly, and every invoice you generate will require correction.
What you need: Legal business information, current sales tax rates for every service area you operate in, and a logo image file (preferably transparent PNG).
Verify before continuing: Open a blank estimate template and verify the business name/logo and tax rate appear correct.
Common mistake: Entering a single tax rate when you serve multiple counties or municipalities that charge different rates. Double-check with your accountant or state revenue department, as sales tax laws for services vary significantly by state.
Step 2: Setup Wizard
What the wizard does: Service Autopilot’s built-in wizard walks new accounts through basic company information, invoice formatting (logo, sales tax defaults, and invoice numbering), and initial resource setup (employees). It aims to put the account in a minimally viable state.
What to prepare beforehand: Gather your business information, tax details, and logo file before beginning, as the most common issue with the wizard is stopping mid-flow to look up information.
What you should verify afterward: The wizard does not configure everything, so double-check your service list, employee records, and tax settings personally after completing it. In my experience, the wizard is a good start but rarely sufficient.
What still needs configuration: Detailed pricing, recurring service intervals, crew assignments, mobile permissions, and most integrations are not fully covered by the wizard and must be configured separately (covered in later steps of this guide).
Step 3: Services, Job Types & Pricing
This is the step I ask every Service Autopilot customer to spend the most time on. Your service catalog drives estimates, invoices, scheduling, and reporting – if it’s configured inconsistently, everything will suffer.
Services: Configure each unique service you provide (mowing, fertilization, snow plowing, pest treatment, etc.) with standardized, consistent naming.
Job types: Categorize your services for reporting purposes so you can see which service lines are (or aren’t) profitable.
Products/materials: If you bill for materials separately (fertilizer, chemicals, mulch), configure these as items so job costing works correctly at the Pro tier and above.
Pricing: Enter current prices for each service. If you price services differently based on property size, region, or contract type, build those variations directly into your service configuration rather than overriding prices on estimates.
Recurring services: Set up the visit frequency (weekly, bi-weekly, monthly, seasonal) for any service sold as a contract or maintenance agreement, as this will drive your recurring scheduling later.
Verify before continuing: Create a sample estimate using 2-3 services and verify pricing, tax, and totals calculate correctly.
Step 4: Employees, Users & Crews
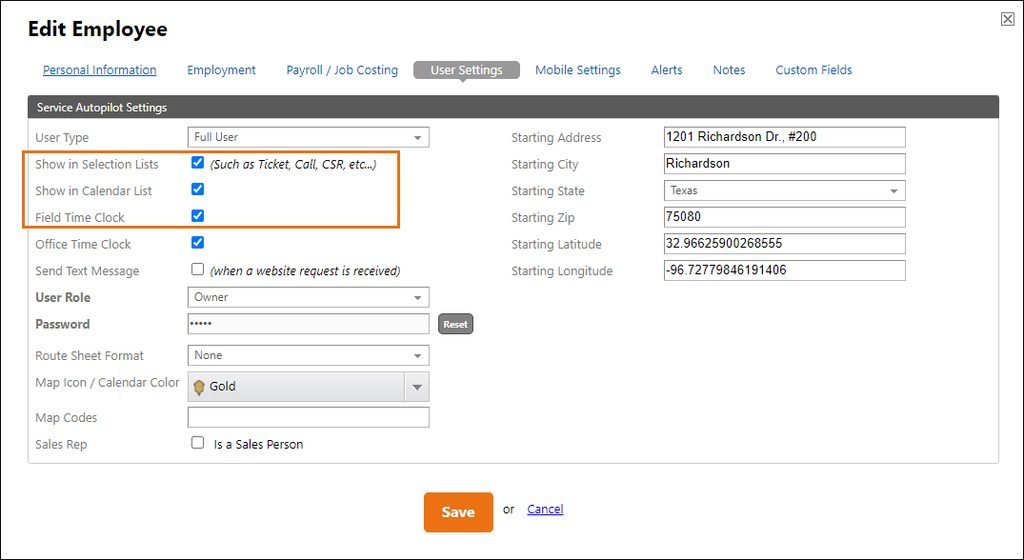
Office users: Designate who needs desktop access to scheduling/invoicing/reporting features.
Managers: Set up manager accounts with appropriate permissions so they can see reports but don’t have access to sensitive settings or payroll information.
Field crews: Add your technicians and crew members as resources, and grant mobile app access if they’ll use it in the field.
Permissions: Set granular permissions for each role. A common mistake is making everyone an administrator “to keep it simple,” which creates configuration issues later.
Crew assignments: Assign employees to crews if you schedule by team rather than individual technician, as this impacts scheduling/reporting later.
Step 5: Customers & Properties
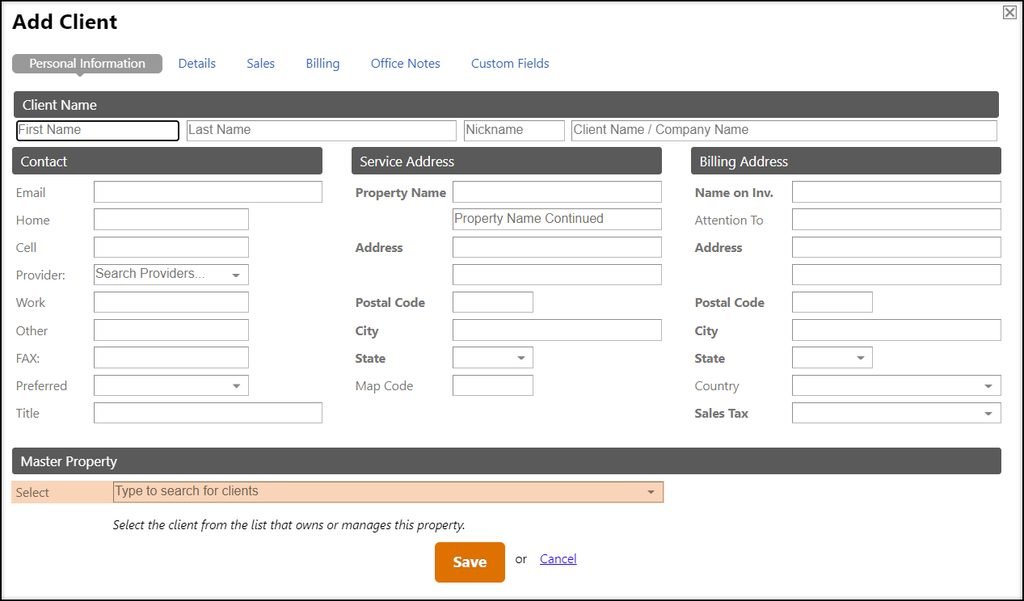
Add/import customers: Import your customer list rather than entering them individually if you have more than a handful of accounts.
Property information: For business customers who receive services at multiple locations (property managers, HOAs, commercial clients), ensure each property is configured as a separate location tied to the correct billing customer.
Addresses: Standardize address formatting before importing, as incorrect or inconsistent address formatting is a leading cause of routing issues later.
Service history: If migrating from another system, import historical service records where possible so technicians and the office have complete records on new customers.
Customer notes: Important information like gate codes, pet warnings, and billing preferences should be added to customer/property notes so field crews see them on the mobile app.
Data verification: Spot-check a sampling (at least 10 percent) of imported records for accuracy before continuing, as issues with imported data compound significantly as you proceed.
Step 6: Scheduling & Routes
First schedule: Build out a single week rather than attempting to schedule months of recurring services at once.
Crew assignments: Assign jobs to crews/technicians as appropriate based on Step 4.
Routing: If using a plan tier that includes route optimization, group jobs by location before applying the route optimizer, rather than feeding it a randomized list of jobs.
Recurring services: Apply the recurring service frequency configured in Step 3 to generate your recurring schedule.
Test one working day: Before moving ahead, test one full day exactly as your crews would experience it to identify sequencing/routing issues with minimal impact.
Step 7: Invoicing, Payments & Accounting
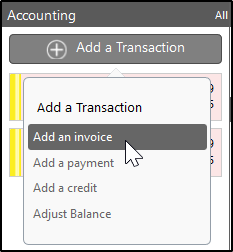
Invoice settings: Confirm invoice templates, numbering, and terms match what was configured in Step 1.
Payment configuration: Set up your payment processor for card and ACH payments if collecting payments online.
Taxes: Double-check tax configuration against a sample invoice rather than the wizard settings.
Accounting workflow: Establish if invoices should sync to QuickBooks automatically or in batches, and who will handle sync/reconciliation on a recurring basis.
QuickBooks/integration considerations: If synchronizing with QuickBooks, understand that changes made in Service Autopilot generally need to be made first before syncing to avoid overwriting in QuickBooks. Consult Intuit’s official documentation for your QuickBooks integration to understand mapping rules for accounts, customers, and items before using the sync for month-end close.
Step 8: Mobile App Setup
For a route-based service business, mobile application configuration is where many setup issues become apparent. Office-side configuration decisions take on new meaning when viewed through the lens of a field technician.
Crew login: Confirm every technician can log in with the correct permissions level before their first scheduled day.
Job visibility: Field crews should only see the information they need: their daily jobs, customer notes, and navigation options, rather than the full office view.
Navigation: Test that addresses route to the correct property entrance, especially for rural properties or unusual access needs.
Time tracking: If using the application for clock-in/out tracking, run through a test shift to confirm time tracking works for payroll.
Photos/notes: Confirm crews can add before/after photos and job notes, as this often becomes a critical defense in billing disputes and warranty issues.
Job completion: Test the completion workflow, including any signature capture, to confirm it triggers invoicing correctly.
Office-to-field communication: Verify that schedule changes made in the office actually appear on the technician’s mobile device in real-time rather than with a delay.
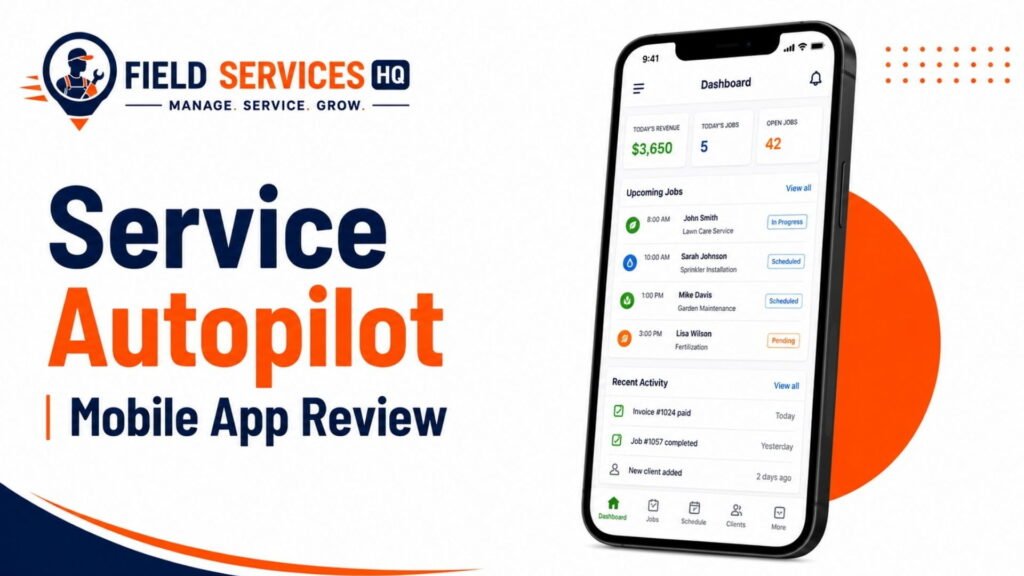
For a more detailed look at what the mobile application interface entails, see our Service Autopilot Mobile App Review.
Step 9: Integrations
Pre-launch requirements: Payment processing and QuickBooks (if applicable) are the two integrations I’d prioritize before going live, as billing/accounting issues stop operations almost immediately.
Post-launch additions: Marketing tool integrations, review platforms, and additional reporting connections can usually wait until after the system is stable.
Dependencies: Payment processing requires invoicing to be finalized (Step 7), and QuickBooks synchronization depends on having the correct chart of accounts (Step 3).
Post-connection testing: Run through one full transaction with each integration (one invoice sync, one payment) before trusting them with production data.
Step 10: Data Migration
If migrating from another FSM or CRM, this is where most companies significantly exceed their setup budget.
What to export: Active customers, properties, service history, open contracts, and invoicing/billing data from your old system.
What to clean: Duplicate customer records, outdated pricing, and inactive accounts should be removed before importing to avoid “cleaning” bad data into Service Autopilot.
What to import: Prioritize active customers and open contracts for initial import, with historical data often following in a second wave after go-live.
What to manually verify: Spot-check pricing, service frequency, and balances after import, as automated migration tools frequently misinterpret custom fields.
Duplicate-data risks: Run a duplicate check both before exporting from your old system and after importing into Service Autopilot, as duplicate customer/property records create significant scheduling and reporting issues that take weeks to resolve.
Step 11: End-to-End Test Job
In my experience, this is often the single most important step in the entire setup process, and the one most likely to be skipped due to time constraints.
Run one full test job through the entire workflow: Customer → Job → Schedule → Crew → Mobile → Work → Completion → Invoice → Payment.
Create a real (or realistic) test customer record, schedule a job, assign it to a crew, have that crew open it on the mobile application as they would in the field, complete the job with photos and notes, generate the invoice, and take payment. If every element works as intended, you have a functioning system. If not, it’s much better to discover the issue on one test job than on your first week with twenty jobs scheduled.
Step 12: Team Training
Each role requires slightly different training before going live:
- Owner/manager: Overview of the system, reporting, and troubleshooting common issues without contacting support for every minor problem.
- Office/dispatcher: Scheduling, customer management, making schedule changes, and communicating with field crews.
- Field crew: Mobile application navigation, job completion, and flagging issues (access problems, additional work needed) from the field.
- Accounting: Invoicing review, payment reconciliation, and understanding how the QuickBooks synchronization works if applicable.
A brief, role-specific training session (30-45 minutes per role) tends to be more effective than one long, comprehensive walkthrough where field crews sit through invoicing procedures they’ll never use.
Step 13: Go-Live Checklist
- Customer data verified and spot-checked for accuracy
- Services and pricing verified against current rate sheet
- Crews assigned and permissions confirmed
- A full week of scheduling tested
- Mobile app tested by at least one real field employee
- Billing and payment processing tested end-to-end
- Integrations (QuickBooks, payments) tested with a real transaction
- Team trained by role
- End-to-end test job completed successfully from schedule to payment
Don’t go live until every item on this list is complete and confirmed, as an issue with billing or mobile access tends to appear at the worst possible moment – mid-week, mid-route, with a customer waiting.
Service Autopilot Setup by Business Type
Service Autopilot is designed for green industry and route-based service businesses, so some configuration priorities shift slightly depending on your specific trade.
Lawn care: Recurring service scheduling and route optimization become priorities, as weekly and bi-weekly services are the lifeblood of most lawn care companies. Set up your seasonal pause/resume rules (for winter, in northern climates) to avoid scheduling jobs during closed seasons.
Landscaping: Configure job costing and material tracking more carefully than a maintenance-only business would, as landscaping projects tend to involve greater material and labor variances that need to be tracked per job.
Snow removal: Configure on-demand or weather-based scheduling patterns rather than fixed recurring visits, and test crew mobile access and dispatch communication before the first heavy snowfall, as this is the trade where configuration issues appear most quickly.
Setting Up Service Autopilot When Switching From Another FSM
If migrating from another FSM, treat this as its own project with its own checklist:
Data: Export all data from your old system in a format Service Autopilot can import (CSV is typically the common denominator).
Customers: Confirm active vs. inactive status mapping before importing customer records, as default imports often carry over years of inactive customers.
Services: Clean and standardize your old service catalog rather than mapping 1:1, as Service Autopilot typically offers fewer but more consistent service options.
Scheduling: Rebuild recurring schedules rather than attempting to import complex recurrence patterns, as these rarely translate directly between platforms.
Billing: Reconcile open invoices and balances in your old system before cutover to avoid disputes over amounts due.
Team: Schedule training to avoid placing new staff in the middle of your busiest season.
Cutover date: If your business is seasonal, plan the switch around lower-volume times of year and communicate this to your team.
Old-system access: Maintain read-only access to your old FSM for at least 60-90 days after cutover in case of questions about historical records.
Data export: Confirm your old vendor allows a full data export before canceling your account, as some FSM providers charge for or restrict data exports after cancellation.
Common Service Autopilot Setup Mistakes
- Importing bad data: Migrating duplicate, outdated, or inconsistently formatted customer records without cleansing
- Creating inconsistent services: Building a service catalog with overlapping or inconsistently named services that hurts reporting
- Over-customizing too early: Building complex automations and custom fields before even testing the basic workflow (schedule → complete → invoice → pay)
- Skipping mobile testing: Assuming desktop configuration will work on the field without actually testing it
- Not testing billing: Going live without running at least one real invoice and payment through the system
- Connecting integrations without testing: Turning on QuickBooks sync or payment processing and assuming it works with full volume right away
- Going live without training: Assuming staff will “figure it out” and ending up fielding support calls during your first busy week
What to Configure First vs. Later
| Configure first | Configure later |
|---|---|
| Business settings | Advanced customization |
| Services | Optional integrations |
| Customers | Advanced reporting |
| Employees | Non-essential automation |
| Scheduling | Nice-to-have settings |
| Billing | Secondary workflows |
| Mobile | — |
How Long Does It Take to Set Up Service Autopilot?
There’s no straightforward answer for this, it’s dependent on the amount of data and business complexity, but here’s a rough breakdown:
- New/deeply small operation (few staff, simple service list, few/no customers to migrate): Could be done in roughly one week of concentrated effort
- Established but clean operation (organized data, straightforward service list): Two to three weeks, with most time devoted to service catalog accuracy and a trial week of scheduling
- FSM migration (years of customer/job history to import): Three to six weeks, with data cleanup proving a time sink rather than the Service Autopilot setup itself
- Bigger/larger/complex operation (multiple crews, nuanced pricing, several service lines, commercial and residential mixed): Four to eight weeks with crews to train and schedule logic to validate
The primary factors influencing longer setup in these scenarios include source data quality, presence of nuance in pricing structure, and whether migrating old contracts is required as well.
When Should You Get Professional Assistance with Setup/Onboarding?
Do it yourself if:
- You have a small footprint business with a simple service catalog
- Your customer data is clean and consistent
- You have someone on staff who can learn how it works and work through setup in a concentrated manner
Get professional assistance if:
- You’re migrating substantial amounts of historical job/customer data from another FSM
- You have multiple crews with complex requirements (pricing, job costing, etc.)
- Your team doesn’t have the bandwidth to work through the setup wizard in a concentrated manner
Professional guidance becomes valuable if you need the system ready by a specific date (contract/season start) and can’t risk delays or complications, or if you have enough nuance in your data that cleanup would take more time than starting fresh with current contracts.
Our Recommendations
Do it yourself if the business is small enough that an individual could realistically manage all the tasks outlined in the above article in two to three weeks.
Get professional assistance if setup would be competing against your busy season, or if you have enough nuance in your data that cleaning it up would be more work than starting fresh.
Don’t go live until you’ve run through the end-to-end test job process (Step 11), and have validated every element on the go-live checklist (Step 13). This single step will eliminate the vast majority of “software doesn’t work” issues I encounter in the first two weeks of use, and will usually result in finding a gap in setup rather than a software limitation.
For the larger perspective on field service scheduling software and how it fits into the greater field service management system, you may want to review our field service management software buying guide as well as our article on field service scheduling and dispatching best practices , and the U.S. Small Business Administration’s helpful report on selecting business software, which provides a broad overview applicable to field service management as well.
Final Verdict
I’m going to try to limit this section, but the basic truth is that Service Autopilot installation takes as long as it needs to in order to get a clean and accurate service catalog and customer base imported before scheduling begins. If you jump this step and do a hasty import followed by some test jobs, there will be issues in the first month of going live that you’ll spend weeks cleaning up.
A small/medium clean operation should budget one to two weeks for setup. If you’re migrating from another FSM, budget three to six weeks for the process. Any operation should consider the test job in Step 11 to be a mandatory part of the onboarding process, regardless of whether self-installing or using a professional. It’ll save you time and headaches in the long run.
Frequently Asked Questions
How do I set up Service Autopilot?
Set up Service Autopilot by configuring business and tax settings first, completing the built-in Setup Wizard, then building out your service catalog and pricing, adding employees and crews, importing customers, building a schedule, configuring invoicing and payments, setting up mobile app access, connecting integrations, and finally running one complete end-to-end test job before going live.
What should I configure first?
Configure business settings (company info, tax rates, invoice defaults) and your service catalog first, since nearly every other part of the system, including estimates, scheduling, and reporting, references these two areas. Employees and customers come next, followed by scheduling and billing.
What is the Service Autopilot Setup Wizard?
The Setup Wizard is Service Autopilot’s built-in onboarding tool that walks new accounts through company information, invoice formatting, sales tax defaults, and initial employee setup. It gets an account to a basic working state quickly, but detailed service pricing, recurring schedules, and mobile permissions still need to be configured manually afterward.
How do I add customers?
Add customers individually through the customer module, or import a cleaned customer list in bulk if you’re migrating from a spreadsheet or another system. Standardize address formatting before import, and separate distinct billing customers from individual service properties if you serve multi-property accounts.
How do I create services?
Create services under the services or job type module by defining each distinct offering with a clear name, pricing structure, and recurring frequency if applicable. Keep naming consistent, since inconsistent service names make future reporting unreliable.
How do I set up scheduling?
Set up scheduling by first confirming your services, employees, and customers are accurately entered, then building a single week’s schedule, assigning jobs to crews, and applying recurring frequency for contract-based services. Test one full working day before scheduling further into the future.
How do I add employees?
Add employees as resources in the employee or user module, assign them a role (office, manager, or field), set appropriate permissions, and grant mobile app access to anyone who will be working in the field. Group employees into crews if you dispatch and schedule by team.
How do I set up the mobile app?
Set up the mobile app by confirming field employee logins and permission levels, testing job visibility and navigation to real addresses, verifying time tracking and photo/note capture, and confirming that completing a job in the app correctly triggers invoicing back in the office system.
How long does Service Autopilot setup take?
Setup typically takes about one week for a small, new operation with clean data, two to three weeks for an established business with organized records, and three to six weeks (or longer for large multi-crew operations) when migrating substantial historical data from another FSM. Data cleanup, not the software itself, is usually the biggest driver of timeline length.
How to configure Service Autopilot step by step?
Configure Service Autopilot by working through the setup in dependency order: business and tax settings first, then the Setup Wizard, followed by your service catalog and pricing, employees and crews, customer and property records, scheduling and routes, invoicing and payment settings, mobile app access, integrations, and data migration if you’re switching from another system.
Finish with one full end-to-end test job (schedule, dispatch, mobile completion, invoice, payment) before you rely on the system for real customer work. Configuring things out of this order, such as importing customers before finalizing your service list, is the most common reason businesses have to redo parts of their setup later.
Affiliate Disclosure: Field Services HQ may earn a commission if you purchase software through links on this page, at no additional cost to you. This does not influence our evaluation criteria, testing, ratings, or conclusions. We only recommend tools we believe can genuinely benefit field service businesses.